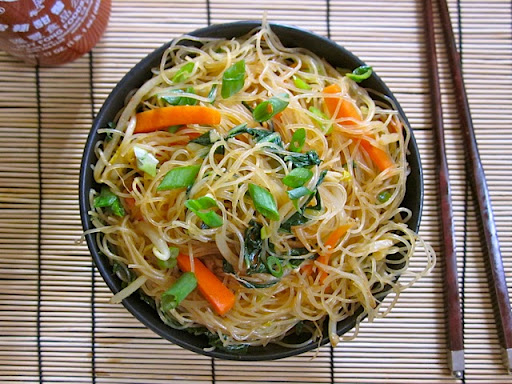
Asian is well known for the consumption of rice throughout the centuries, as well as their love for spices and vegetables; this dish contains all three elements. Personally, this is one of my favorite dishes ever since I was little; exactly, I used call it "yellow mein" due to the yellow color the curry taints the rice noodles. In cantonese that would be "Sing Chau Mai" meaning Shang Hai rice.
 Shang Hai Noodles
 By: Juliana doRosario
1 small carrots
1 medium sized onion
1 small green pepper
50 grs Garnished Asian style pork
1 large egg
3 cloves of garlic
Salt and pepper to the taste
About 2 tbsp curry
1 portion rice noodles
7 cooked shrimp
- In a wok, boil enough water to cover the rice noodle. Once boiled remove wok from heat and insert noodles and with the heat of the water let it cook. When the rice noodles have reached the tenderness you prefer, remove from hot water into a colander and give it a quick rinse. The rice noodles should be "al dente" due to later usage.
- Meanwhile, slice up the carrot, onion, pimento, and pork into "julianas" and beat up the egg in a small bowl. Next, chop up garlic into little pieces as possible; almost mincing up the garlic.
- Using the same wok, put it over high heat and spread vegetable oil evenly throughout the whole wok using a oven glove, bamboo brush or any thick table cloth. Allow wok to heat up and add in the eggs, twirl the wok around to spread out the egg evenly throughout the wok. Cook for about 2-3 minutes depending on your heat and flip it to get a nice golden color con both sides. Retrieve the egg without removing wok from heat and set aside for later use.
- Next, add around 1/4 cup of oil, wait till it gets heated up and add in "minced" garlic, to get that nice flavor into the oil, stir for a minute and add remaining vegetables and about 1/2 tsp of both salt and pepper and curry. (Note: Most curry powder are not spicy; if spicy noodles are unwanted, add less pepper) Stir for about 2-3 minutes, again depending on your fire time will vary. Don't leave the vegetables in the oil for a long time, veggies are suppose to be semi cooked.
- Add in remaining ingredients and twirl and stir the wok making sure the rice noodles get stained with the curry and veggies, pork and shrimp are well mixed within the noodles. Remove from heat and place on serving dish.
- Roll up and slice the egg made earlier and place them above the noodles as a final touch.
Serve warm, along with some asian hot sauce.
Makes 1 serving.
Credits:
To my dear mother who has taught me everything I know today and has shown me our family secrets and tips in the kitchen. This was one of my favorite dishes and because of her patience I was able to learn how to make it! THANK YOU MOMMY! (:
And to Victor Salom for requesting this recipe to be posted up on the blog! ilu!!
And to Victor Salom for requesting this recipe to be posted up on the blog! ilu!!


